
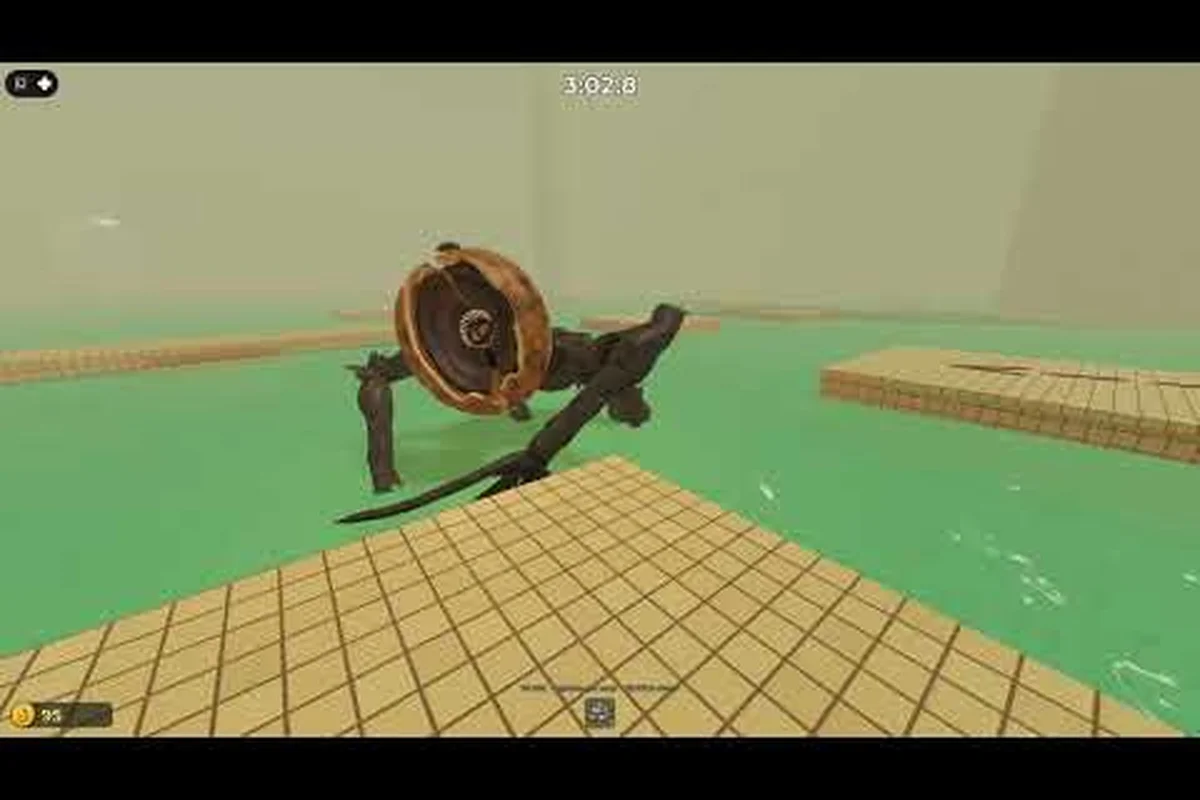
DONT SPLASH turns every jump into a risk because a blind monster follows the sound of water. This dont splash obby guide explains the route, sound mechanics, and jump patterns that help new Roblox players reach the exit while keeping the flood below quiet.
DONT SPLASH Obby Guide: Objective and First Route
The official DONT SPLASH game page on Roblox describes a horror platformer set above dark water. Your job is simple at the broadest level: reach the high exit without making enough noise to draw the creature into your position. Everything difficult comes from how the environment punishes hurried movement.
The game’s most useful visual language is consistent. Yellow platforms mark the intended route, while black wall arrows point toward the next safe landing. Floating sections test horizontal spacing, rotating bridge planks demand timing, and the maintenance lock requires finding both valves. Community walkthroughs consistently point to that same escape sequence, suggesting that route knowledge matters more than expensive gear during the opening attempt.
| Route element | What it tests | Recommended response |
|---|---|---|
| Yellow platforms | Distance and landing accuracy | Look ahead instead of jumping at the nearest edge |
| Black wall arrows | Direction and puzzle order | Follow the arrow before entering the next area |
| Rotating bridge planks | Timing and balance | Wait for the plank to turn toward the landing |
| Maintenance lock | Two-part valve objective | Find both valves before climbing to the high exit |
| Dark water | Monster attraction | Avoid falling and prevent unnecessary splashes |
A first run is mostly reconnaissance. The basic survival loop is to observe, commit, land, and wait for the next safe movement. If you fall, treat the failure as feedback about the route rather than proof that the game is unfair. This matters because a horror obstacle course punishes panic more consistently than it rewards speed.
For the broader setup, including the basic controls and survival priorities, use the DONT SPLASH beginner guide. Its overview is especially helpful if you want a clean explanation before memorizing the route.
Sound, Water, and Monster Detection Mechanics
The central rule of DONT SPLASH is that the creature reacts to splash sounds rather than sight. This turns an ordinary platforming mistake into a horror event. Falling into the pool is dangerous, but entering water already may not expose your exact position, so sound management matters even when you survive the jump.
Player-reported mechanics identify thrown pebbles as an active decoy. Instead of jumping into water to redirect the monster, you can create a controlled splash away from your route. That trick is less useful during the first seconds of a chase, but it becomes valuable once you understand where the creature tends to patrol.
| Situation | Noise exposure | Risk level | Better choice |
|---|---|---|---|
| Clean platform landing | Low | Low | Continue after confirming the next landing |
| Landing near the pool edge | Low to medium | Medium | Keep a safe buffer from the water |
| Missing a platform | High | High | Retreat if possible and use a pebble away from the route |
| Falling into the water | Very high | Extreme | Expect the creature to investigate the splash |
| Throwing a pebble away from yourself | Controllable | Low | Use only when it creates useful distance |
This sound-based design makes the silent landing objective more valuable than a generic speed objective. A fast player who splashes every third step may attract the creature sooner than a careful player moving at half the speed. The best route is therefore the one that reaches a stable position with the fewest noisy failures.
The official listing describes a blind monster that hunts by sound in a flooded pool maze. Community tips add that retries are normal because progression is knowledge-based before tool upgrades become affordable. Together, those sources point to a practical rule: learn the map first, then optimize movement.
Turning Sound Into a Defensive Tool
A pebble does not replace route knowledge, but it can create breathing room. The useful pattern is to throw away from the intended path, wait for the splash, and move while attention is displaced. Throwing directly beside the next platform is counterproductive because the decoy may pull the monster into the same area you need to cross.
Controlled distraction also depends on timing. Throwing too early gives the creature ample time to return, while throwing too late may occur after it has already located you. Save the resource for a genuine emergency or use it to clear a difficult crossing after the monster has moved into the opposite side of the level.
DONT SPLASH How to Jump Without Waking the Water
Successful movement comes from controlling the moment before takeoff, not from pressing the jump button repeatedly. Players often lose momentum by moving sideways at the exact instant they leave a platform, which causes an undersized jump. Instead, square up with the next landing, clear the edge, and correct only after the character is in the air.
The safest rhythm is look, align, jump, stabilize. First, identify the next yellow surface and estimate whether the gap is straight, diagonal, or broken into multiple hops. Second, face the landing so you are not relying on a midair turn. Third, jump with enough run-up to cover the distance. Fourth, make small corrections and keep landing momentum low until the next route is visible.
| Jump type | Common error | Corrective technique |
|---|---|---|
| Short straight gap | Jumping while drifting sideways | Face the target and jump straight |
| Diagonal gap | Cutting the corner too early | Take a wider approach before committing |
| Long gap | Starting from the platform’s outer edge | Begin with a clear run-up |
| Rotating plank | Jumping during the turn | Wait for the plank’s alignment |
| Narrow landing | Holding forward after touchdown | Release movement to avoid overshooting |
This same approach answers the practical question of how to jump in the game: preserve forward alignment, avoid unnecessary corrections, and use a deliberate approach rather than a panic input. The creator’s movement system may reward different speeds on different platforms, so consistency is more reliable than trying one universal technique.
Practice the First Hazard Pattern
Open with the floating platforms, where each landing gives you time to reset your aim. Make a short run, stop at the visible edge, and look down to confirm the next surface. If a miss seems likely, step back rather than trying to correct a bad takeoff in midair.
A useful training routine is to cross the same opening section three times with different goals. On the first pass, prioritize clean landings. On the second, minimize running distance. On the third, practice pausing safely after every landing. This separates movement control from route memory and makes it easier to identify the exact action causing a splash.
Rotating Planks, Valves, and the Maintenance Lock
The rotating bridge sequence is the route’s clearest timing test. Each plank continues moving even when the player waits, so rushing blindly can be worse than standing still. Before stepping on, identify the landing side and watch one full turn. Enter when the plank is moving toward the exit, not merely when it happens to be horizontal.
The rotating plank timing is best treated as a transport problem. You need a continuous safe window from boarding to leaving, and a narrow landing at the far end can erase any advantage from an early step. If the plank faces away from the route, use the pause to inspect the next platform and plan the transfer.
| Platform challenge | Early mistake | Safer timing plan |
|---|---|---|
| First rotating plank | Stepping on at the wrong angle | Watch one complete rotation |
| Middle turn | Jumping as the platform turns | Land, stabilize, then begin the next step |
| Far-side landing | Continuing forward while adjusting | Release input after touchdown |
| Plank approaching a wall | Waiting until the route is blocked | Commit on a full turn toward the exit |
| Broken plank chain | Leaving before the next piece aligns | Treat the chain as one continuous timing window |
After the bridges, the maintenance lock adds a different kind of challenge. The route requires opening both maintenance valves before climbing toward the high exit. Search the room rather than assuming the first visible valve is the only objective. Black arrows should help distinguish the intended order, and consulting a verified DONT SPLASH walkthrough on YouTube can help clarify the room when the environment becomes dim.
Do not rush from the second valve to the exit without checking behind and below you. A valve room often encourages players to turn in circles, and hurried camera movement can make a nearby safe area look like a hazard. Clear the area once, remember the exit’s direction, and then return if a door, lever, or visual cue was overlooked.
Escape Plan After Opening the Valves
Once both valves are open, the high exit should become reachable, but the danger does not automatically vanish. The water continues to threaten the route, and the creature may already be moving because of earlier noise. Keep the same discipline used in the opening area: land, look, and then advance.
If the creature appears during the climb, avoid an uncontrolled drop into the pool. Use a clean return to a known platform, and use a pebble only when the decoy can pull attention away from the climb. The verified walkthrough demonstrates that the intended escape leads from the valves to the high exit, so completing the valve objective is the priority rather than searching for an alternate path.
A dont splash horror obby guide to Safer Retries
A failed attempt becomes easier to learn from when you identify whether the mistake was a movement error, a route error, or a noise decision. Movement errors involve poor alignment or mistimed plank jumps. Route errors involve missing a valve, ignoring an arrow, or exploring the wrong branch. Noise decisions involve falling, splashing near the edge, or creating a distraction in the wrong place.
The retry loop should be short and specific. After a death, stop before restarting and name the mistake in one sentence. “I jumped sideways” is more useful than “bad jump,” because it tells you exactly what to change. This process is especially important in a horror platformer, where the same impatient action can cause the same result repeatedly.
| Failure pattern | Likely cause | Change for the next run |
|---|---|---|
| Repeatedly missing the same platform | Sideways takeoff | Approach straight and jump from a stable position |
| Falling after a valve is opened | Route memory gap | Mark both valve locations mentally |
| Creator catches the player near a bridge | Noise or timing | Wait for full plank alignment |
| Player wanders after the second valve | Unclear exit direction | Check the wall arrows before climbing |
| Fast opening attempt ends in water | Overconfidence | Slow down and make every landing quiet |
This makes the game’s horror less arbitrary. You do not need to defeat the monster through superior gear; you need to reduce accidental noise and preserve a route through the level. As community walkthroughs report, failed jumps remain normal even for experienced players because the environment demands exact execution.
Players who want a broader list of adjustments can compare the essentials in the DONT SPLASH tips for beginners. The most effective tip there is also the most transferable: treat the first successful route as the training run, not as a speed test.
Difficulty, Equipment, and Route Priorities
DONT SPLASH offers different difficulty choices, and the correct starting option is the one that lets you observe the hazard timing. A harder mode can make every error more punishing, especially when the creature reacts to repeated splashes. Before beginning a difficult run, compare the practical implications in the guide to playing DONT SPLASH with friends, which also explains how difficulty choices affect the experience.
Equipment has less value than route knowledge early on. The community run review explains that progress is primarily knowledge-based before tool upgrades are affordable. That means spending every available resource on a small advantage is less valuable than reaching the valves with a route understood and a stable jumping rhythm.
| Priority | Early-run value | Reason |
|---|---|---|
| Learn the arrow language | Essential | It reveals the intended branch |
| Master clean landings | Essential | Prevents monster-attracting splashes |
| Memorize valve locations | High | Shortens risky searching |
| Learn plank timing | High | Converts an unfair-feeling gap into a repeatable jump |
| Upgrade tools | Moderate later | Helpful once the route is understood |
| Chase maximum speed | Low initially | Increases missed jumps and noise |
A good progression plan has three layers. Route knowledge tells you where to go. Movement control lets you arrive without falling. Equipment and decoys then provide margin during danger. Reversing that order creates a character that feels powerful in menus but struggles at the exact moment precision matters.
Do not assume a stronger tool eliminates the need for caution. The creature’s hearing-based detection means that even a capable runner becomes vulnerable after a splash. Stay quiet even when your route is memorized, because a clean run is built from consistent decisions rather than one dramatic escape.
Final Route Checklist for a Quiet Run
The complete route is easiest to remember as a chain: identify the yellow platforms, follow the black wall arrows, time the rotating planks, find both maintenance valves, and climb to the high exit. Each stage reduces the amount of uncertainty in the next, provided you avoid the water and do not create unnecessary noise.
Before a run, check your camera angle, release any movement input, and place your character near the center of the starting platform. During the run, look at the next landing before committing to the current jump. Around bridges, wait for a full useful turn. In the maintenance room, search deliberately for both valves. Near the exit, continue using the same quiet landing routine even if the monster is no longer visible.
The central lesson of this dont splash mechanics guide is that control beats speed. Clean water avoidance preserves stealth, consistent plank timing prevents avoidable falls, and completed valve objectives keep the route moving. With the route memorized, DONT SPLASH becomes less about surviving random chaos and more about executing a repeatable sequence of careful decisions.
Frequently Asked Questions
What is the best route through DONT SPLASH?
Follow the yellow platforms and black wall arrows, cross the rotating bridge planks, open both valves in the maintenance lock, and then climb toward the high exit. Keep the camera focused on the next landing and avoid the pool edge, because splashes can direct the creature toward your position.
How do I jump farther in DONT SPLASH?
Face the next platform, create a short but stable run-up, and avoid drifting sideways during takeoff. Make small corrections only after leaving the edge, then release forward input after landing so you do not overshoot a narrow platform. Consistency matters more than holding the jump key longer.
Can thrown pebbles distract the monster?
Yes, according to community tips, pebbles thrown into the water act as a decoy. Throw them away from the route you need, ideally when the creature is moving toward another area. A pebble used beside the next landing may attract the creature toward you instead of creating useful distance.
What should I do after opening both valves?
Return to the marked exit route, confirm the high exit, and climb without rushing. Continue watching the next platform rather than assuming the end is safe after the valve objective. If a fall is likely, retreat to stable ground because a water splash can undo the progress you made in the maintenance room.
Is DONT SPLASH suitable for new Roblox players?
It is approachable because the controls are simple, but the sound-based monster and precise platforming make early attempts demanding. New players should learn the arrow language, practice clean landings, and focus on completing the route rather than setting a speed record. Mistakes are expected during the learning process.